Using S3 Browser for Importing Documents
One of the best features of Processing 10.3 is the streamlined data transfer and direct import from S3 storage. This will be the single method for importing data into the processing environment thus it requires some change to your standard processes and some quick setup to get started.
Data in previous msa-transfer buckets is being transferred to a new revealdata-S3staging-xxxxxx bucket which is the only one that will import data into Reveal Processing. This must be configured in your environment. Please use the instructions and links below to establish access to your S3 storage if this has not been done before, or just update by adding the new external bucket.
S3 Browser Usage
Amazon provides a Simple Storage Service ("S3") which Reveal utilizes heavily with a variety of our operations. A third-party client utility, S3 Browser Pro, provides mechanisms to upload to and download content from S3 with a user-friendly interface. Due to its advanced functionality, including parallel uploads and downloads, hashed uploads, and filtering tools, Reveal recommends the use of the S3 Browser.
You can download S3 Browser at: https://s3browser.com/download.aspx.
Note
To use S3 Browser Pro, you must purchase a license from Amazon. The free version of the S3 Browser is designed for personal use only.
To configure an S3 Browser account:
Accounts -> New Account
Account name can be whatever you like
Account type is S3 storage
Paste your access key and secret access key into the appropriate fields
Ensure that Use secure transfer is selected
Click Add New Account
You should see the following prompt:
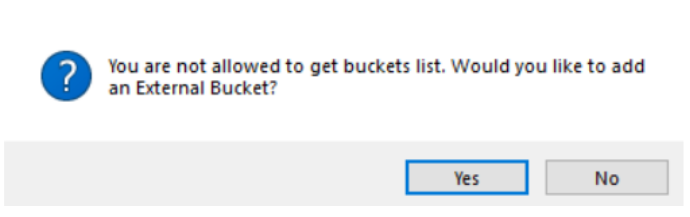 |
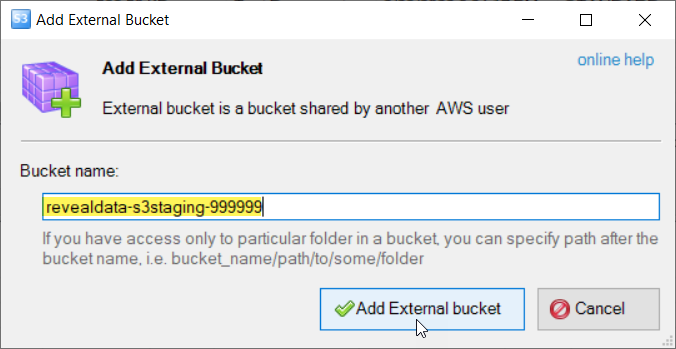
Answer "Yes", and then input the Bucket name below when prompted, where “XXXXXX” will be replaced by an MSA number provided by Reveal, and click the "Add External bucket" button:
 |
If you receive an error after adding the external bucket, close S3 Browser and re-open.
Note
In order to use advanced features such as parallel upload – the ability to set multiple threads for transfer -- you must purchase and register S3 Browser:
Purchase a license at https://s3browser.com/buypro.aspx. This license costs $29.95 and can be activated on three workstations.
Help -> Activate Pro Version.
Paste your activation code into the box.
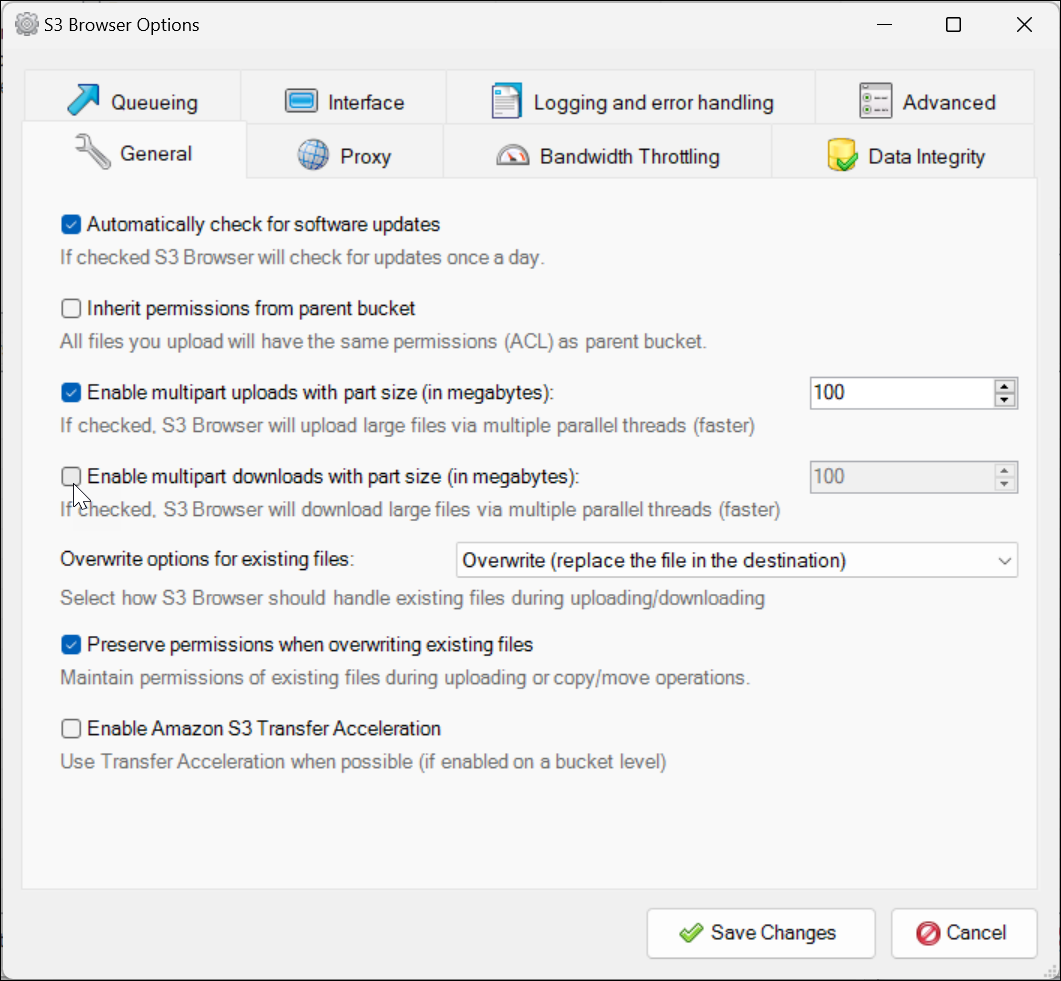
To configure advanced S3 Browser (version 10.5.x) options:
From the S3 Browser menu, navigate to Tools → Options → General.
Enable multi-part uploads with a part size of: 100MB. Disable multi-part downloads: this has been found to be slower as it downloads in parts, then stitches the file back together in a single-threaded fashion, which may take at least twice as long as downloading with a single part.
Note
Change value to 512 when uploading more than 1 TB.
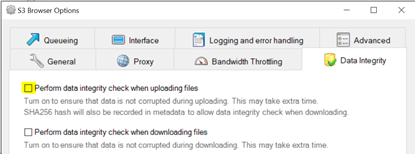
Switch to Data Integrity tab.
Ensure Perform data integrity check when uploading is unchecked.
Switch to Queueing tab.
Switch Maximum number of concurrent uploads and Maximum number of other concurrent tasks to 8 per the screen recommendation. This may need to be adjusted based upon your bandwidth and load. (Maximum number of concurrent downloads is here set to 1 with multipart downloads disabled.)
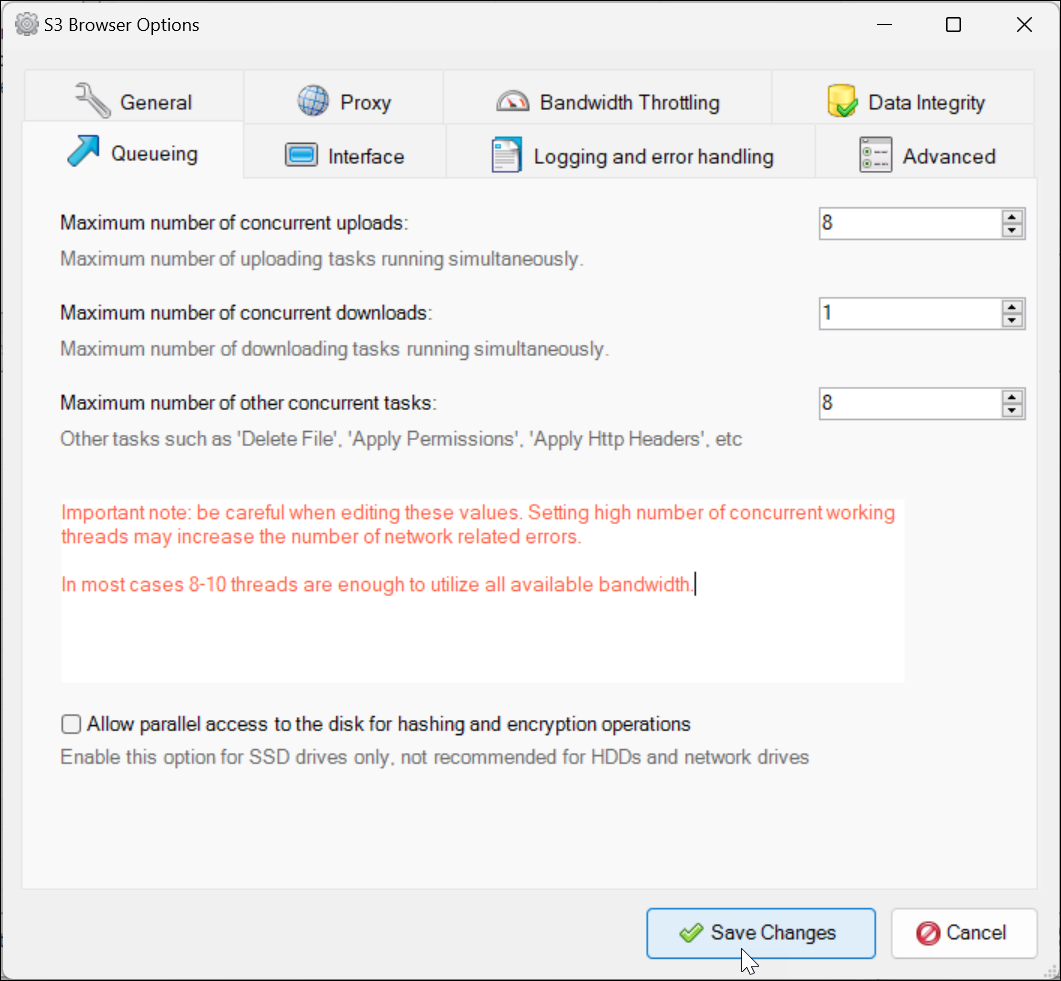
Click Save changes.
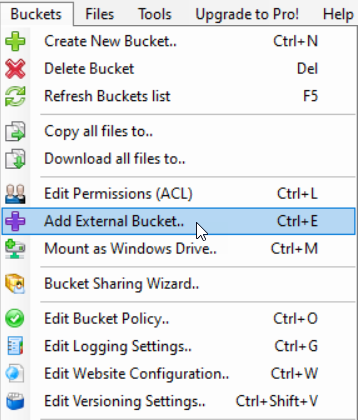
Adding an External Bucket
To create a additional buckets, go to S3 Browser's Buckets menu and select Add External Bucket.
 |
Enter the name of the bucket that has been supplied by Reveal, and click Add External bucket.
 |
The new bucket and anything already in it will appear in your bucket list.
Q&A
Q: Do I need to upgrade to the Pro version?
A: Yes. The free version is limited to a maximum of two threads for upload or download, which is far too limited for even average discovery datasets. There are additional performance enhancements in the Pro version.
Q: I licensed the Pro version over a year ago. Do I need to renew?
A: Yes. License renewal is required to upgrade to the latest version.
Q: What version of S3 is required by Reveal?
A: Reveal requires S3 version 10.3.x or above.
Q: What are Reveal’s policies for S3 data retention?
A: There are different user-defined retention polices placed on the Persistent and Temporary object storage locations. These are governed by the S3 Object Lock retention modes to enforce retention policies, governance, and compliance regulations. We also use this as a second layer of fall back should something get deleted on accident. Details are as follows:
Persistent Folder: There is a 7-day retention period placed on an object once you have executed a delete action. If you have the appropriate permissions you can delete, move, copy, these objects. The objects in this folder are tied to Reveal Processing and Reveal Review. If you were to delete an object from here, it will be retained for 7-days until the retention time period has been met.
Temporary Folder: There is a blanket 30-day retention policy set for objects in this folder. Any object moved into this folder is automatically deleted after the 30-day time period has been reached for the object.
Please contact support@revealdata.com with any additional questions you may have.
Importing Documents
Once configured, new import functionality outlined in the link provides what is needed to start ingesting new data directly from S3 improving processes and time to get projects started.
The Import Module creates, manages, and deletes imports for the project. Imports running on the current machine are represented in the Import Module Navigation pane with the icon. After an import has successfully been ingested into the project, the import is represented in the Module Navigation with the icon. All controls in the Imports Ribbon are based on the active or selected import. To select an import simply click on the import in the Import Module Navigation which will bring up the import's snapshot as well as highlight the import in blue.
 |
Importing Data into a Project from S3
New Import – Click the New Import button in the Import Ribbon to launch the Import Data form.
Import Path – The Import Path is set to default to the S3 data store bucket for your account. This location and the access keys required are configured during installation.

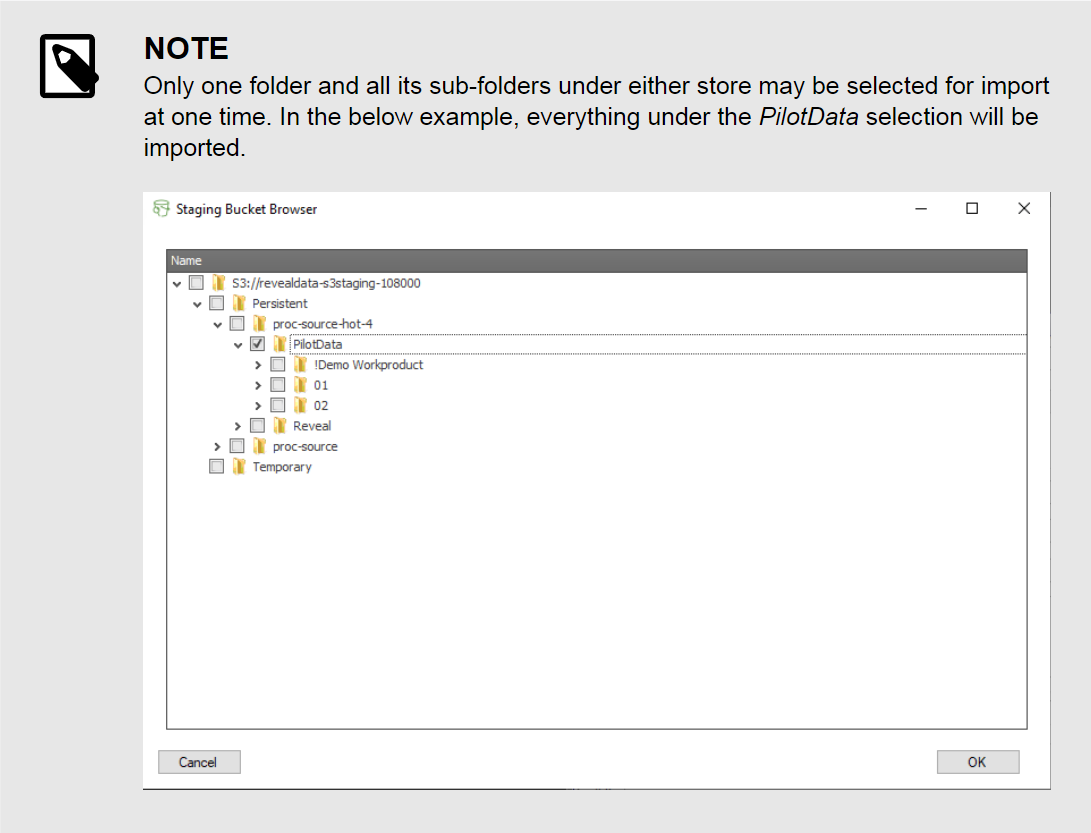
Clicking the green button to the right of this field opens the Staging Bucket Browser.
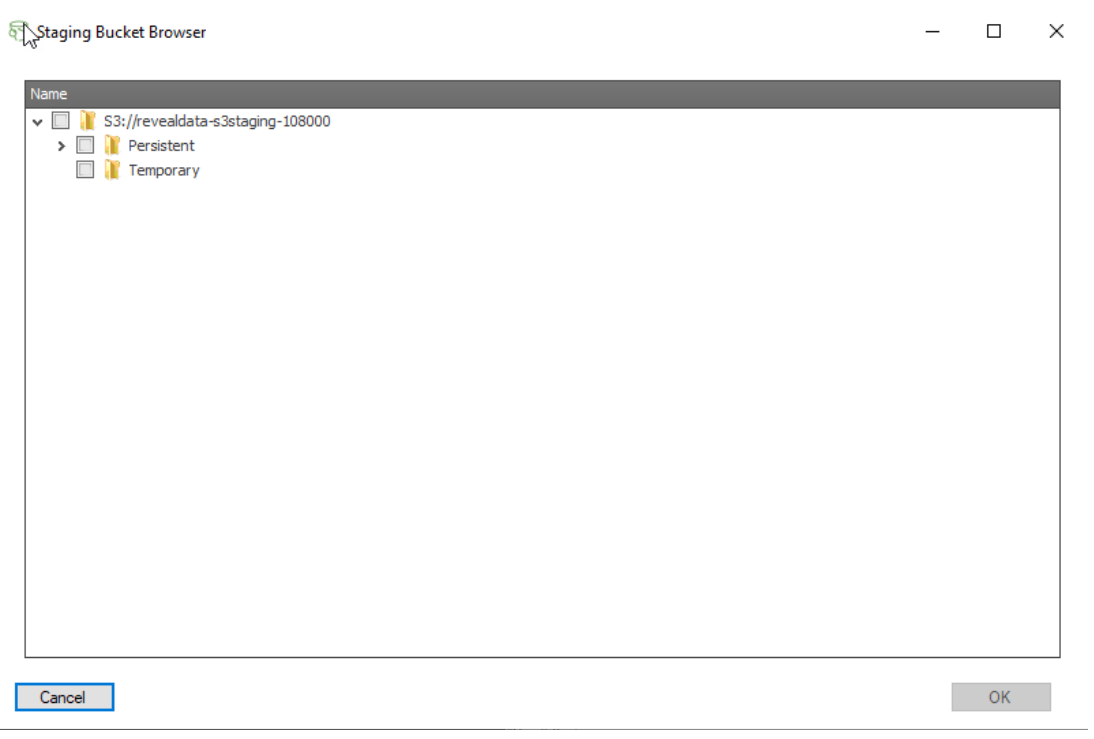 |
There are two main stores within the S3 bucket:
Persistent - Data in this store is retained even after ingestion and processing. Unless removed within 30 days these data are charged as inactive storage.
Temporary - Data in this store is automatically deleted after 30 days so no reminder to remove is required after import and QC are complete.
 |
On-premise users may browse to the top level folder of the source data by clicking the button and choose the source folder.
If you need any assistance with this transition, please contact your Customer Success representative or Consultant to set up time to discuss.