How to OCR
Where text cannot be extracted from native documents, optical character recognition (OCR) is the process used to generate indexable text from document images. Reveal Processing has two ways to run OCR on imported data:
Automatically during Import (configured in Project settings); and
Via an OCR Job run from the Project Module.
Automatic OCR During Import
When creating or modifying a Project in Reveal Discovery Manager, the Project Setting that is used to specify OCR for all project imports is Processing Options - OCR.
 |
In Discovery Manager’s Home toolbar, click New Project.
Step through New Project creation to the Processing Options – OCR page.
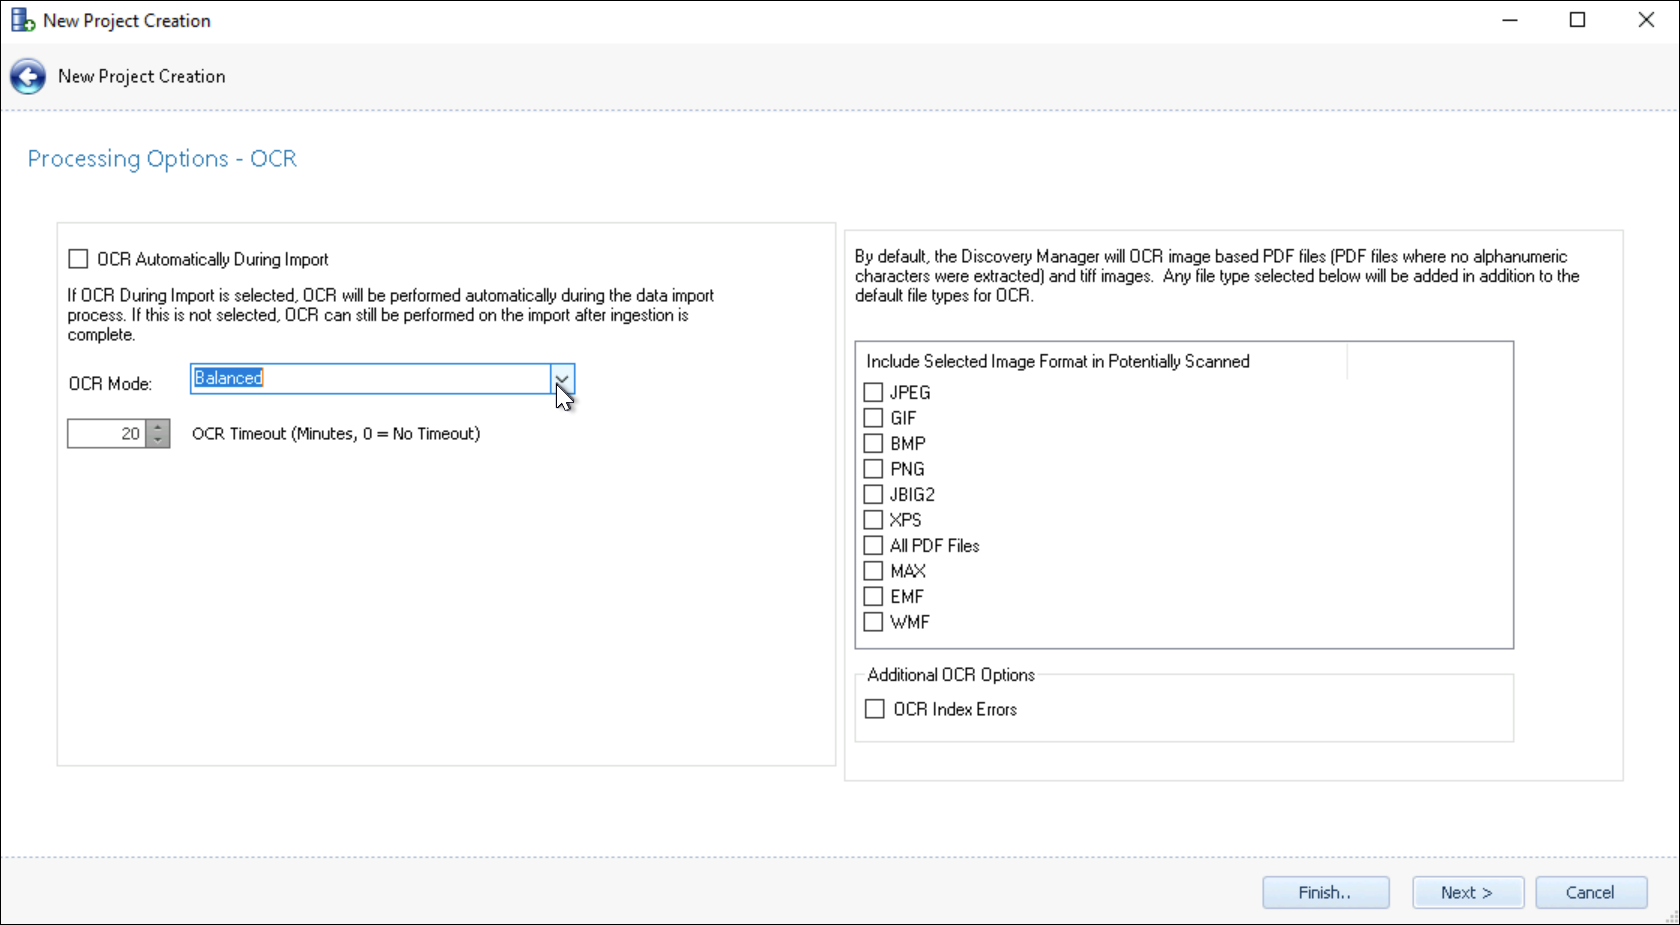
Check OCR Automatically During Import. If OCR During Import is selected, OCR will be performed automatically during the data import process. As the screen text reminds us, if this is not selected, OCR can still be performed on the import after ingestion is complete.
Select OCR Mode:
Most Accurate – attempts to analyze the initial interpretation of characters against dictionary and syntactical logic. This can greatly increase the time required to OCR a large import dataset.
Balanced – (default) includes basic spelling logic when interpreting character renderings to improve OCR quality without greatly sacrificing performance.
Fastest – Accepts first impression of characters to ingest OCR text most quickly. This may be acceptable where scanned or PDF image text is of uniformly high quality.
Set OCR Timeout (Minutes, 0 = No Timeout) for a threshold after which OCR will stop and allow the import to complete. The default is 20 minutes.
Include Selected Image Format in Potentially Scanned allows image formats other than standard image PDF and TIFF to be added for OCR processing. These other formats may also be handled using a Selective Set of documents identified after ingestion.
Additional OCR Options - Index Error files are files that have no text associated with them, but were properly recognized, not encrypted, and most likely not corrupt. To have OCR performed on these files select this setting.
Complete the remainder of the New Project wizard and Create Project to set your project specifications.
You may modify any of these Project items under Project Settings.
Create an OCR Job
If you have not specified automatic OCR during import, or need to address OCR errors or outlying file types, you can select Create OCR Job under the Projects Module.
 |
Open the Projects Module in Reveal Discovery Manager.
Select your Project.
Click Create OCR Job.
The New OCR Job dialog box opens.
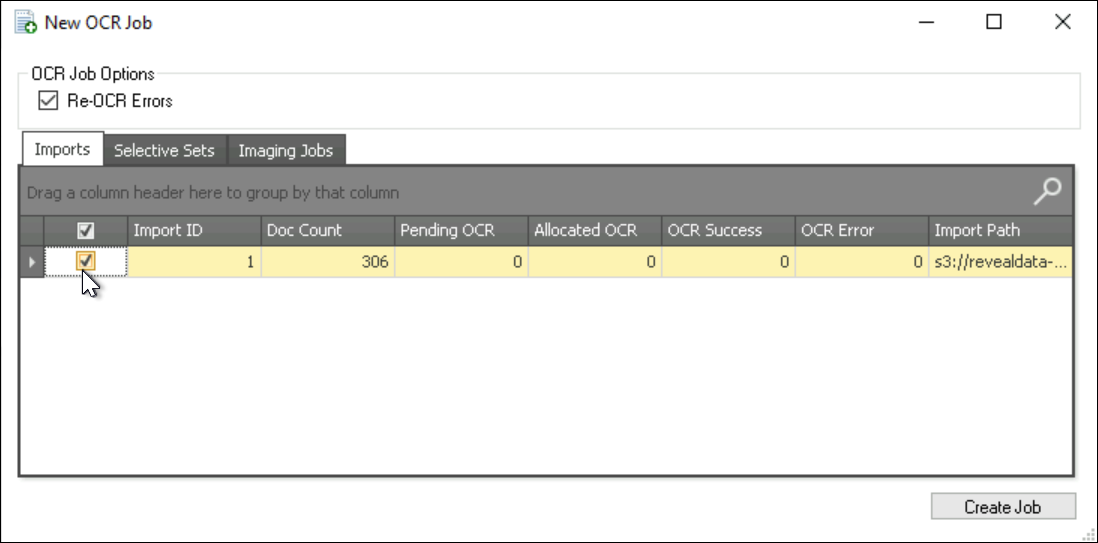
The first option is a checkbox to Re-OCR Errors.
The first tab in the OCR job selection table below is Imports, where one or more project imports can be selected for OCR processing (including, if selected, re-OCR of errors).
The second tab is where one or more Selective Sets can be added; for example, if a Selective Set incorporated searches for JPEG and PNG file types on ORIGFILEEXT metadata, that selective set could be checked here.
The third tab, Imaging Jobs, will create an OCR task on the selected imaging job scope for all successfully imaged documents. The informational text for this tab informs us that if documents have been previously OCRed within the system they will be OCRed once again if selected here.
Click Create Job in the tab containing your selection(s) to proceed.
Open the Environment Module.
First open the PENDING screen.
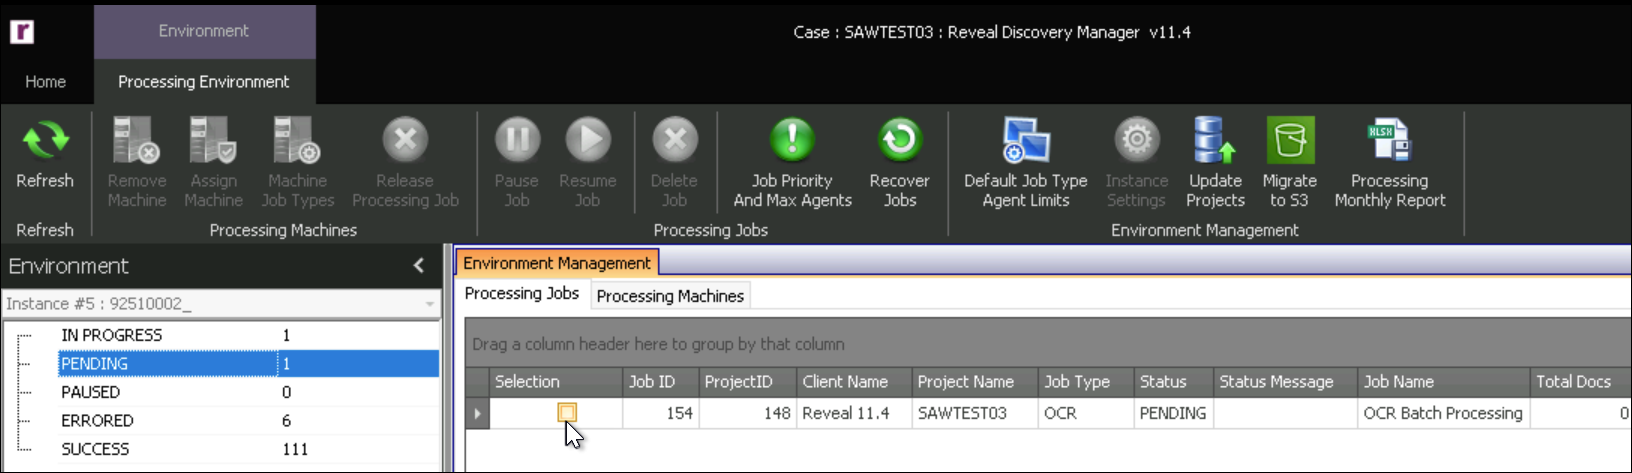
You will see your job here as a processing machine is found to address the job.
The job to go to IN PROGRESS as processing begins; job status will be reported here.
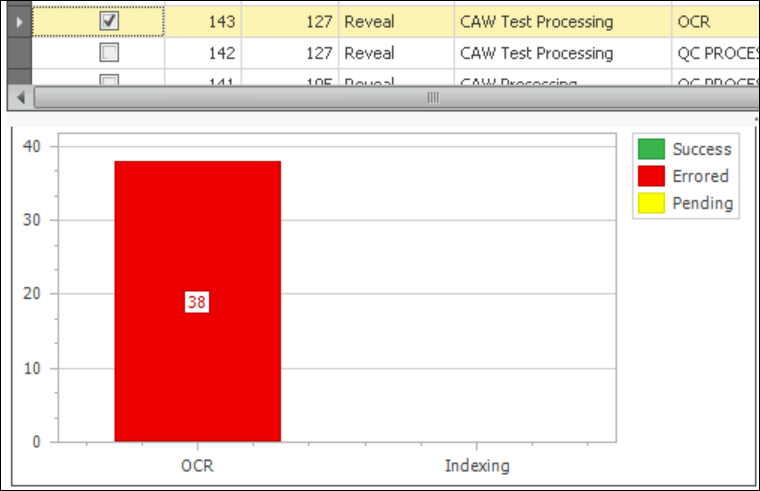
When completed, a job that finishes without errors will be listed under SUCCESS. We see shadow bar graphs superimposed here because the job contained no documents requiring OCR.
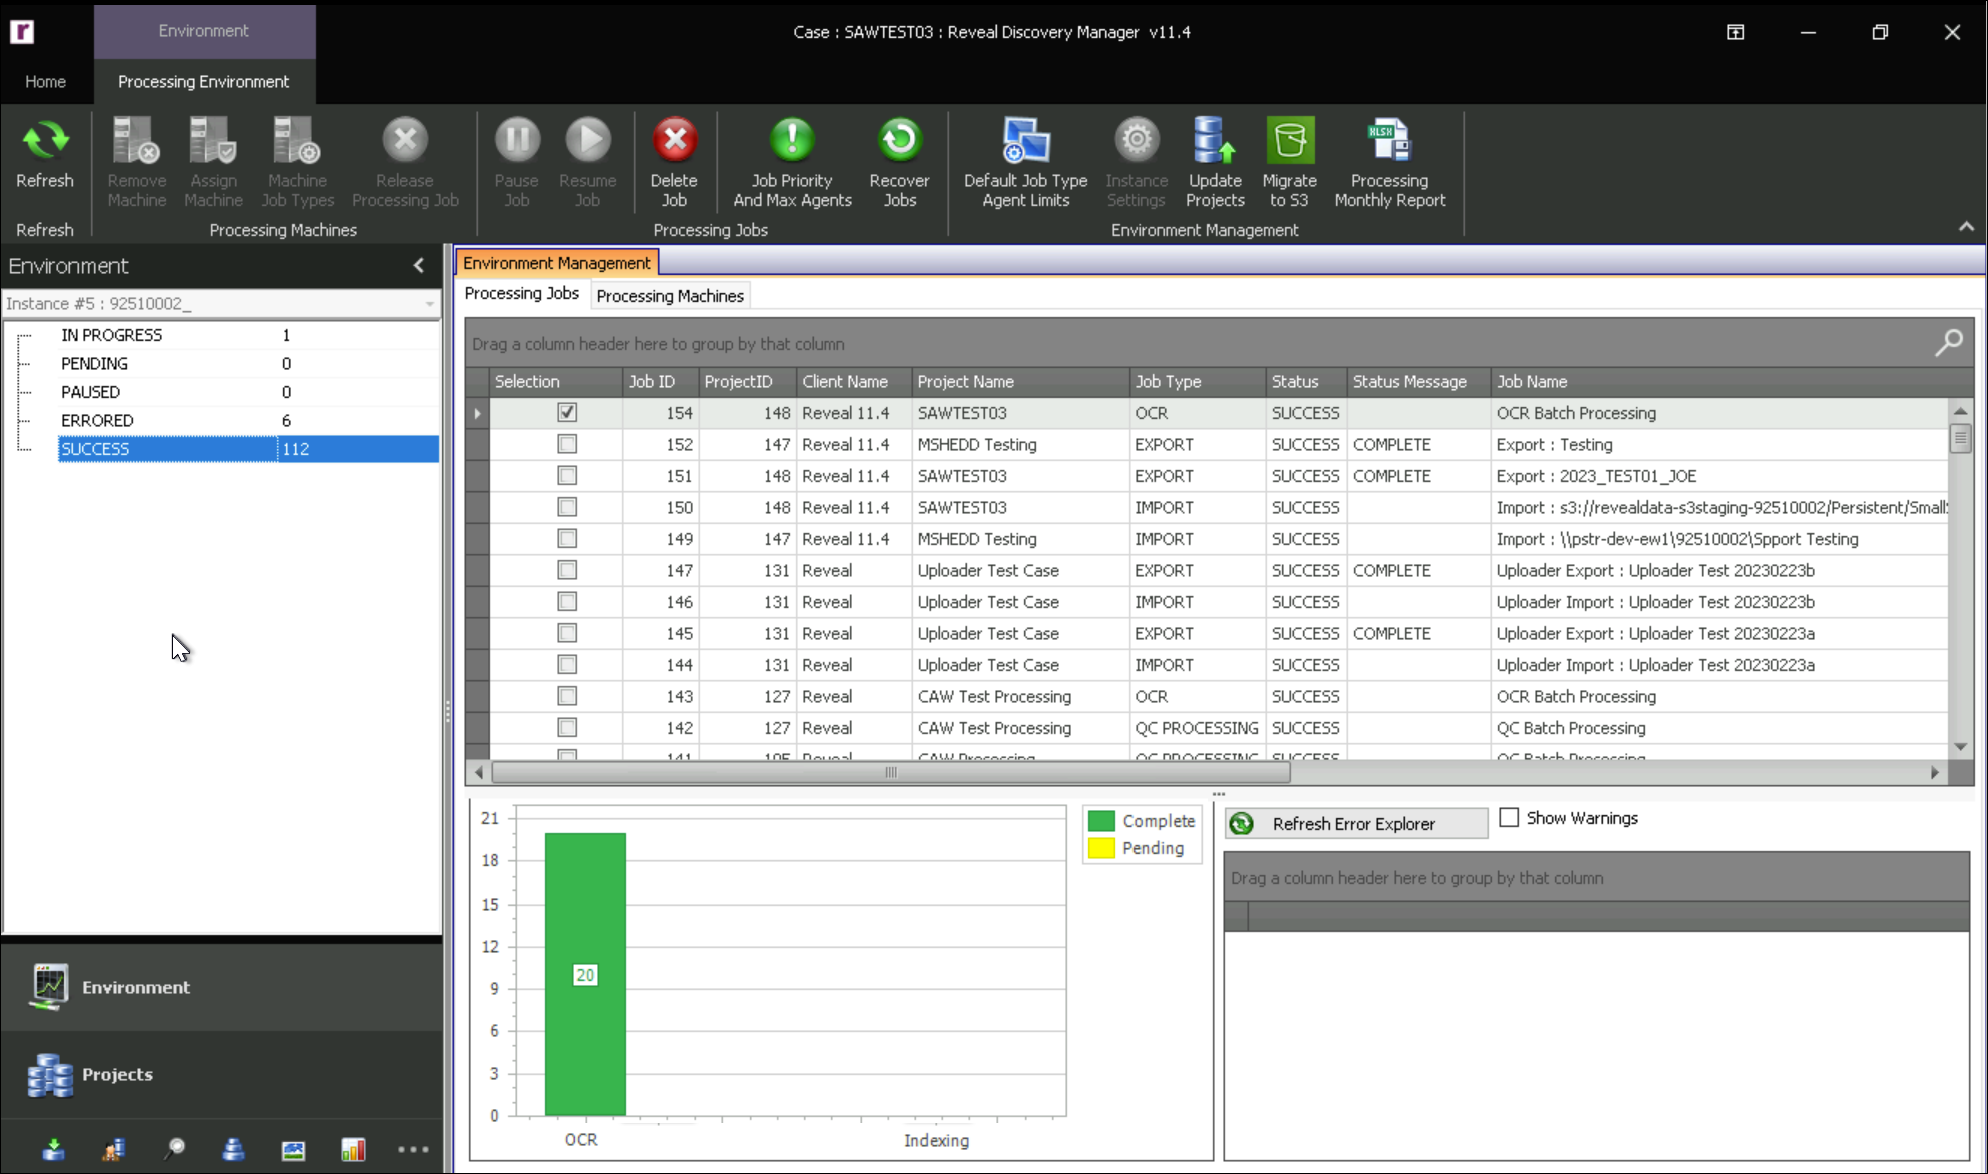
If a job did not complete successfully, you will find it under ERRORED.