Import Module
The Import Module creates, manages, and deletes imports for the project. Imports running on the current machine are represented in the Import Module Navigation pane with the  icon. After an import has successfully been ingested into the project, the import is represented in the Module Navigation with the
  icon. All controls in the Imports Ribbon are based on the active or selected import. To select an import simply click on the import in the Import Module Navigation which will bring up the import's snapshot as well as highlight the import in blue.
Importing Data into a Project
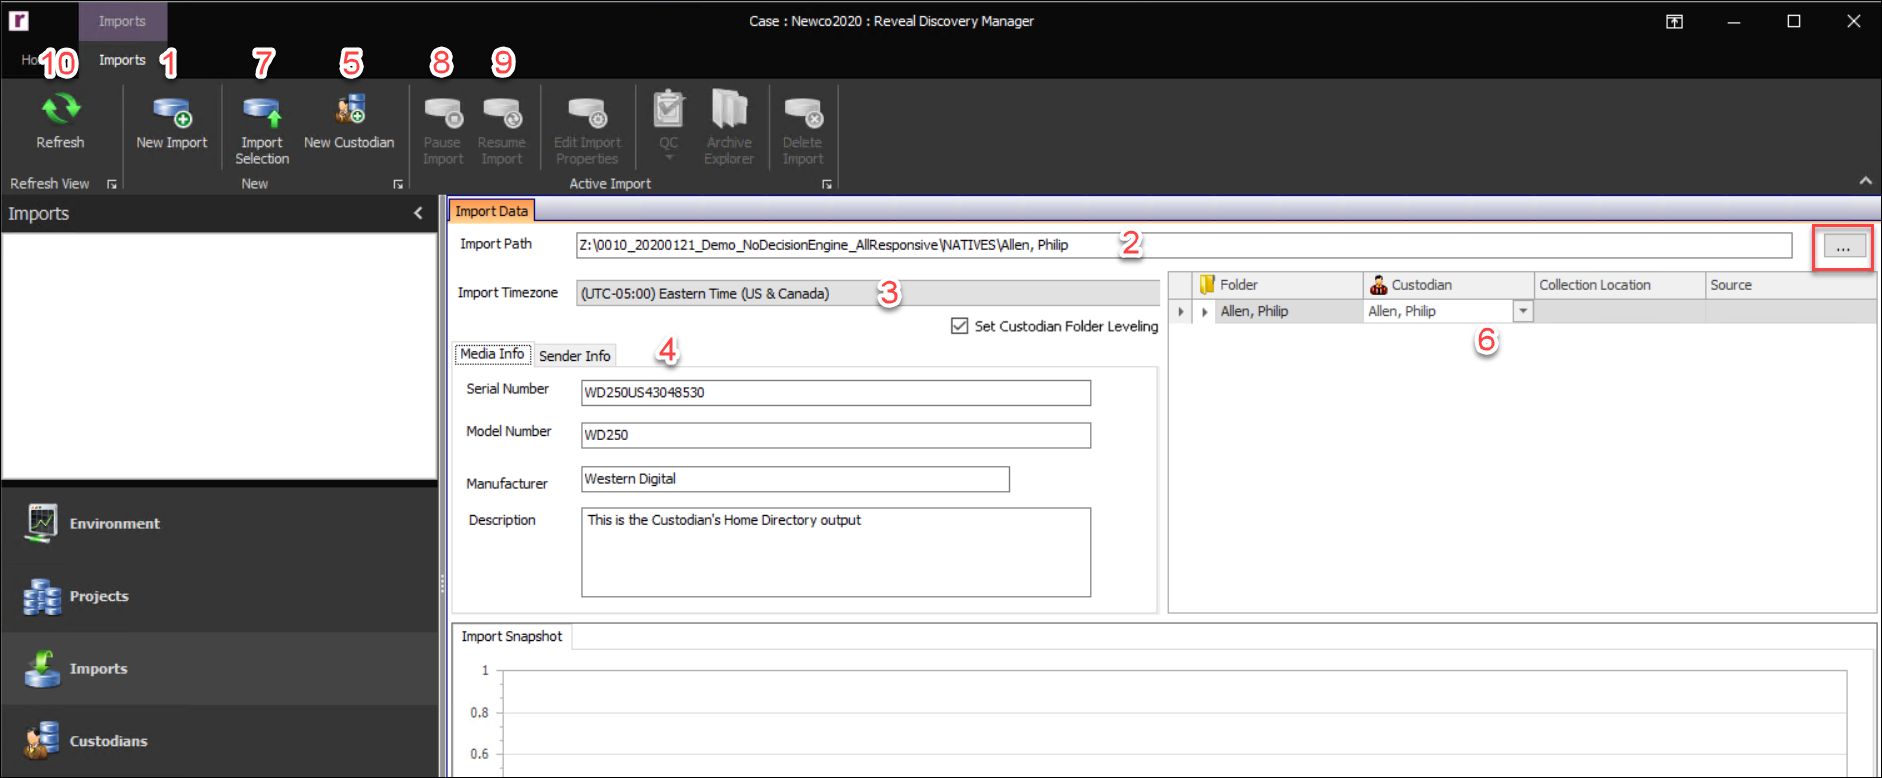
New Import – Click the New Import button in the Import Ribbon to launch the Import Data form.
Import Path – The Import Path is set to default to the S3 data store bucket for your account. This location and the access keys required are configured during installation.

Clicking the green button to the right of this field opens the Staging Bucket Browser.
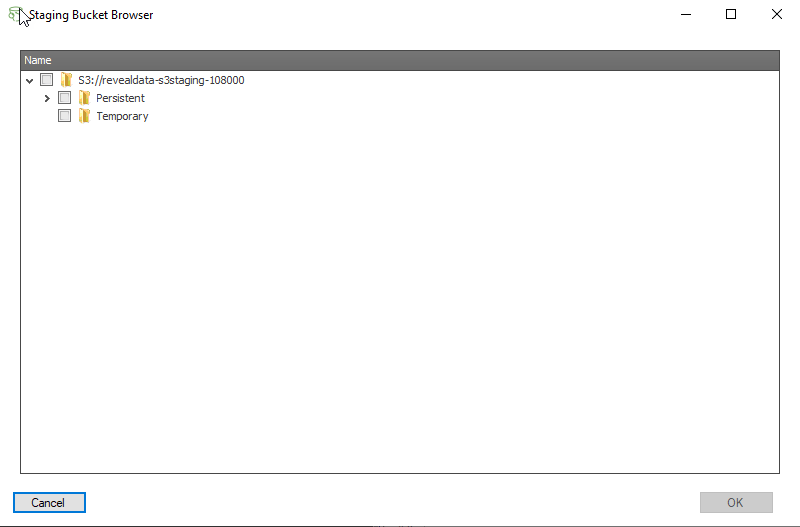
There are two main stores within the S3 bucket:
Persistent - Data in this store is retained even after ingestion and processing. Unless removed within 30 days these data are charged as inactive storage.
Temporary - Data in this store is automatically deleted after 30 days so no reminder to remove is required after import and QC are complete.
Note
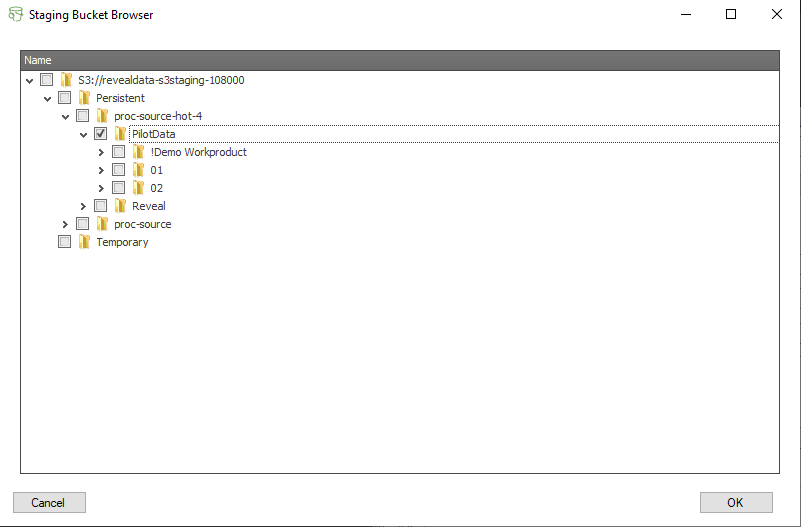
Only one folder and all its sub-folders under either store may be selected for import at one time. In the below example, everything under the PilotData selection will be imported.
On-premise users may browse to the top level folder of the source data by clicking the
 button and choose the source folder.
Import Timezone – By default, the timezone is set to the local timezone of the machine. If the data was collected in a different timezone, click the
 drop-down menu and choose the timezone according to the location of the collection.
Note
At this point the data can be imported without any other settings by clicking the Import Selection button in the Imports Ribbon.
Set Custodian Folder Leveling - Checking this option allows for foldering items under the base import path by custodian in staging, assigning (and creating) custodians. It takes the last folder in the imported data and assigns that folder name as the data's custodian name. So in the illustration below, the data would be foldered by custodian shackleton_s and then the custodian data within those folders. The assignment will happen during import, and if a custodian with the given folder name doesn't exist it will be created.

Import Details – There are two types of additional details that can be added to an import:
Media Info – If the import is located on a hard drive, enter the hard drive’s serial number, model number, and the manufacturer of the hard drive to track the hard drive. A description of the data can also be added to help better track the data. This information can be recalled later in the Reports Module.
Note
This information can be edited or added after an import completes by clicking the Edit Import Properties button in the Imports Ribbon.
Sender Information – To track the sender of the data, enter the contact’s information. Click the
 button to upload the Chain of Custody. This information can be recalled later in the Reports Module.
New Custodian – To create a new Custodian click the New Custodian button in the Imports Ribbon and the form below will appear. There are two types of Custodians that can be created. Each Custodian requires the input of a Custodian Prefix. One of the settings in Export is Custodian Prefix Incremental when it comes to numbering the files. This will add the Export Prefix onto the number for files pertaining to the Custodian within any scope.
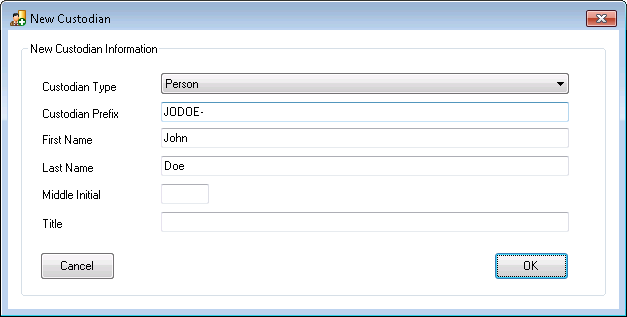
Person – This is the default Custodian Type. The minimum information for a Person Custodian is the First Name and Last Name. After filling out the New Custodian form, click OK, and the
 icon will appear in the Module Navigation and the Custodian Management section within the module form.
Entity – The other Custodian Type is Entity. This Custodian Type allows for only one name if necessary. To create an Entity Custodian, click the Custodian Type drop-down, change it to Entity, and enter the Entity Name. After filling out the New Custodian form, click OK, and the
icon will appear in the Module Navigation and the Custodian Management section within the module form.
Import Custodian Assignment – If the import belongs to one or more Custodian(s), the data can be assigned to the Custodian(s) automatically by clicking the
 drop-down menu and choosing the applicable Custodian(s). To expand the import pathing structure, click the
  button. If it is preferred to assign the data to the Custodian(s) after the data is imported, the default Unassigned Custodian and assigned within the Custodian Management Module after the import completes.
Import Selection – Click the Import Selection button in the Import Ribbon to import all of the data under the source folder.
Pause Import – This will pause the import, so that the import can be resumed later. There are several reasons to pause an import, but the two most common reasons are to start importing data that has priority over the suspended data.
Resume Import – This will resume any import that was suspended or interrupted abruptly.
Refresh – Click the Refresh button in the Import Ribbon to refresh the Imports Module to show new imports as well as to update the import group’s statistics.
After Importing Data into a Project

Import Status – The import Status chart displays counts for all import items which are not successfully completed. The chart updates every 10 seconds and reports on the tasks for the import job, broken down by the following categories:
Copy – The copying of a source file into the project.
Archive – Decompressing of unique archives within the import.
Hidden Content – The evaluation of hidden content on original documents within the import.
Password Bank – The attempt to decrypt unique password protected documents within the import with the provided passwords.
OCR – OCR processing of unique documents within the import when OCR during import is enabled.
Indexing/Language ID – The indexing and/or language identification for generated OCR text and Extracted text from unique documents within the import.
Import Snapshot – After the import has completed processing the Import Snapshot will be populated with a bar graph containing the following measurements:
Source Files – This is the number of files imported into Discovery Manager before processing. This number should mirror the total number of files on the import media. It allows QC to make sure that the number of files imported into Discovery Manager before processing is the same number of files that was on the source media.
Expanded Files – Total number of files (source files and archive children) after processing prior to any data filtering.
Archives – Total number of completed and errored archives contained within the import.
Errored Archives – Total number of errored archives in the import.
Filtered Files – Total number of files filtered out of the project due to project level filters (Date, File Type, deNIST).
Note
This count also includes inline image attachments removed with the "Suppress Inline Image Email Attachments" option within the Embedded Object settings.
Project Files – Total number of files contained within the project after processing and filtering.
Duplicates – Total number of duplicates contained within the import.
Indexed – Total number of successfully indexed files within the Project Files. These are the files that are available for searching within the index. A file can have both electronic and OCR text. If the file has one or more of these text types, the file will be considered Indexed and one or both text files will be indexed for searching.
OCR Success – Total number of files that successfully completed the OCR process within the import.
OCR Errors – Total number of files that errored during the OCR process within the import.
OCR Pending – Total number of files that are potentially scanned within the project. This will consist of all TIFF images as well as image based PDF files.
Non-Indexable Files – Total number of files where text extraction will not be attempted as Reveal believes no usable text will be generated from these file types. For a complete listing of these files please see Appendix B. These files will not be available for searching.
Encrypted – Total number of files identified as encrypted or password protected and that do not have text extracted. These files can be decrypted by using the Password Bank. Please see the Import Module for directions on how to do this. If these files are not decrypted, they will not be available for searching.
Index Errors – Total number of files where both text extraction and OCR has failed. These files will not be available for searching.
File Recognition Errors – Total number of unrecognizable file types contained within the import. These files will not be available for searching.
Imports Module Navigation – Each import has an icon, import path/ID, and a tree view. The following explains the different import icons and their meaning:
Import Icons
 Successful Import
After the import has completed processing successfully, the Successful Import icon will be displayed in the Imports Module Navigation. Double click on the Successful Import icon and Import Snapshot as well as Import Data under the Module’s Form are repopulated with the information from the import.
 Paused Import
To suspend an import while it is processing click the Pause Import button in the Import Ribbon. This will suspend the import at that moment in time. After an import has been suspended the Paused Import icon will be displayed for the import in the Imports Module Navigation. To resume a suspended import, click on the Paused Import icon and then click on the Resume Import button in the Import Ribbon.
 In Progress Import
If an import is in progress, the In Progress Import icon will be displayed in the Imports Module Navigation. Another scenario where this icon would be displayed in the Imports Module Navigation is if the import errors out during processing owing to the shutting down of Discovery Manager via the Task Manager or an unexpected interruption. To resume a suspended import, click on the In Progress Import icon and then click on the Resume Import button in the Import Ribbon.
 Import Missing Files
If the native file could not be copied from the source data to the processing folder, the Import Missing Files icon will be displayed in the Imports Module Navigation. Typically, this issue is seen when the antivirus is not properly configured on the Discovery Manager workstation or there were unforeseen network hiccups.
When this happens please contact support@revealdata.com. Depending on the number of affected files this issue can be recoverable with the help of the Reveal Technical Support Team. If the issue is deemed non-recoverable the underlying issue will be resolved by the Reveal Technical Support Team and the import will need to be deleted and reimported again.
 Import Error
If a major error occurs during the import, the Import Error icon will be displayed in the Imports Module Navigation. An example is where Discovery Manager cannot extract a proper date for the file(s).
When this happens please contact support@revealdata.com. Depending on the number of affected files this issue can be recoverable with the help of the Reveal Technical Support Team. If the issue is deemed non-recoverable, the underlying issue will be resolved by the Reveal Technical Support Team and the import will need to be deleted and reimported.
Import Path/ID – Next to each import is the assigned Import ID (this is automatically created by Discovery Manager) as well as the Import Path of the source data.
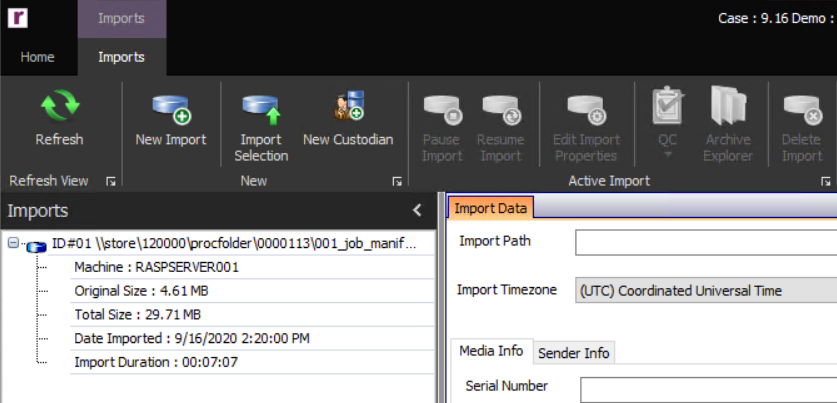
Import Tree View – Expand the tree view and the following data is displayed:
Machine – This is the machine that processed the data.
Original Size – This is the original size of the imported data in megabytes preprocessing.
Total Size – This is the total size (original size + the size of the extracted archive children) of the data imported in megabytes post processing.
Date Imported – This is the date the data was imported.
Import Duration – This is the total time in minutes it took to import the data. This value is rounded down, so if an import took less than a minute to process, it will display 0 minutes.
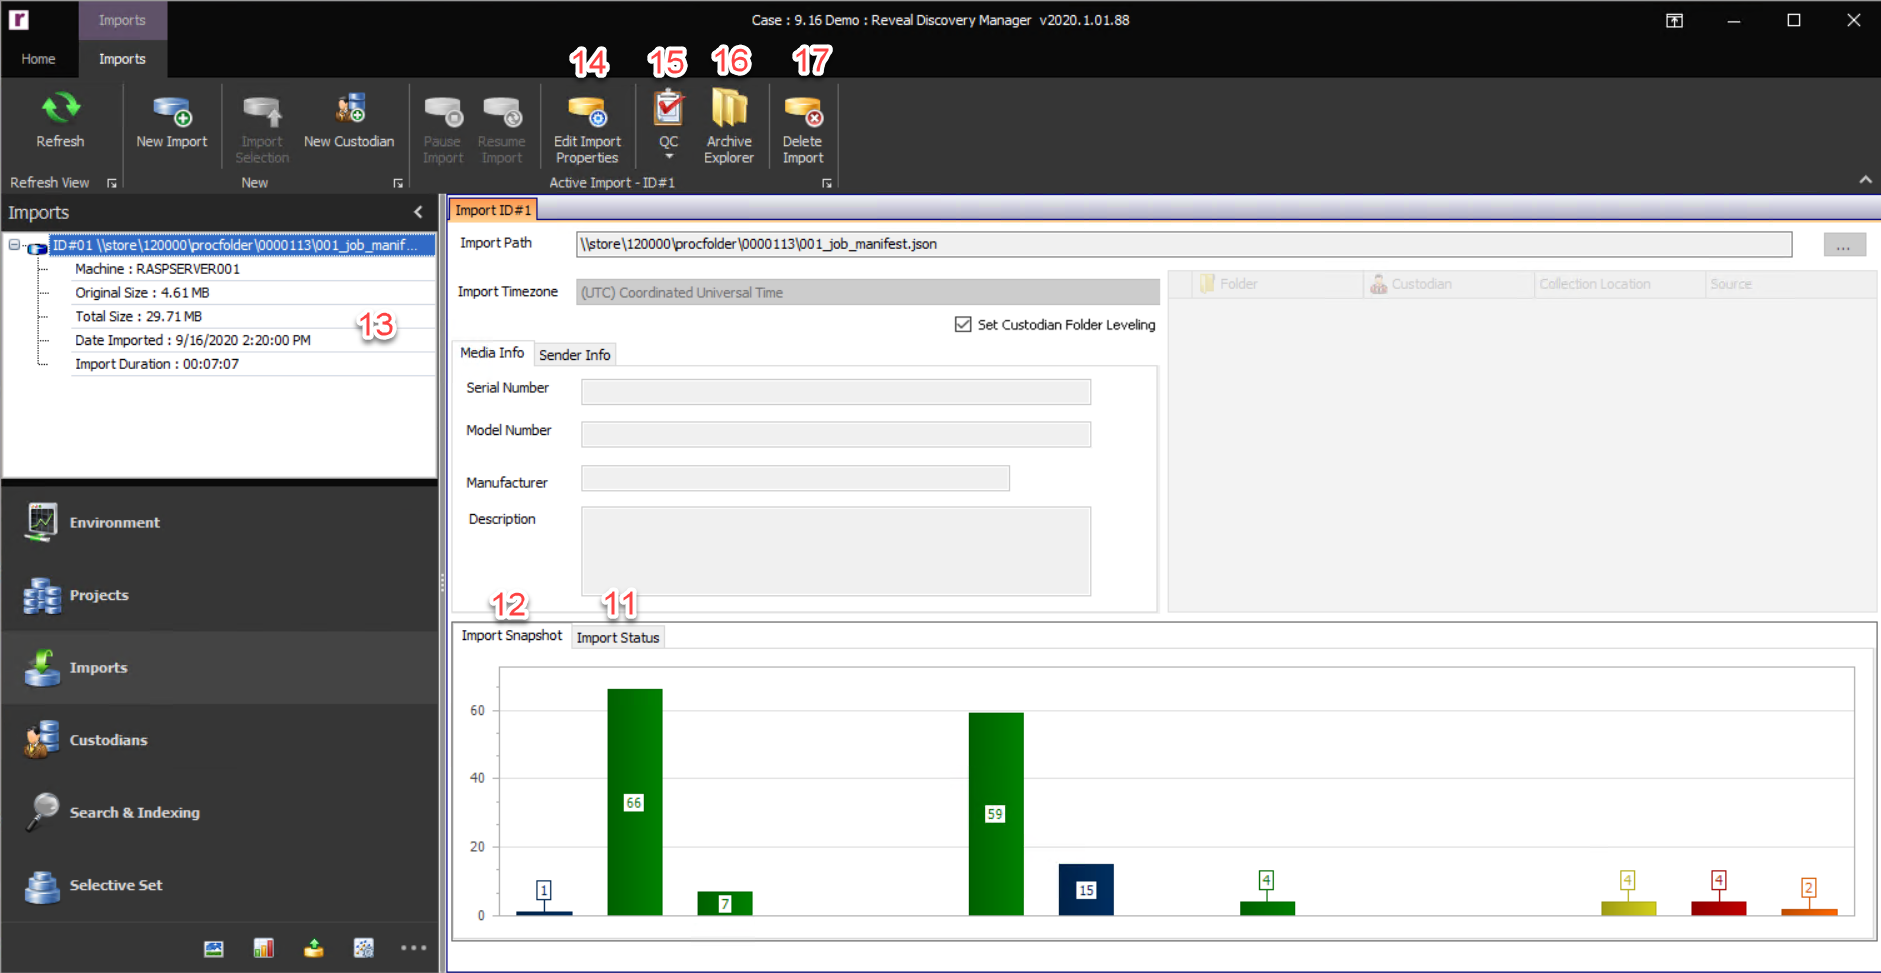
Edit Import Properties – To edit the Media Information or Sender Information after an import completes click the Edit Import Properties button in the Imports Ribbon.
Note
The Serial Number, Model Number, Manufacturer, and Description fields are exportable fields in the Export Module. Whatever values are provided in these fields can be exported (MEDIASERIAL, MEDIAMODEL, MEDIAMANUFACTURER, MEDIADESCRIPTION) into the resulting DAT file on the file level to any file within the import. If there is custom information that needs to be exported on the file level for an import such as an internal media tracking number this is where it could be added.
QC – To resolve all import exceptions click the QC button. More detailed information is below in the Import QC section.
Archive Explorer – Displays all processed archives in the import.
Delete Import – To delete an import first click on the import in the Imports Module Navigation and then click the Delete Import button in the Imports Ribbon.
Note
This will not delete all files from the project’s processing folder for the import. Under no circumstances should a user ever manipulate or delete any folders within the processing folder of an active project, so do not delete the import’s corresponding folder in the project’s processing folder. Please contact Reveal Technical Support with any questions about deleting import material.