Custodians Module
Custodians are the persons or entities producing documents for a project. Assigning documents by custodian may be done at import or afterward in the Custodians Module to assist in evaluating streams of data for review.
 |
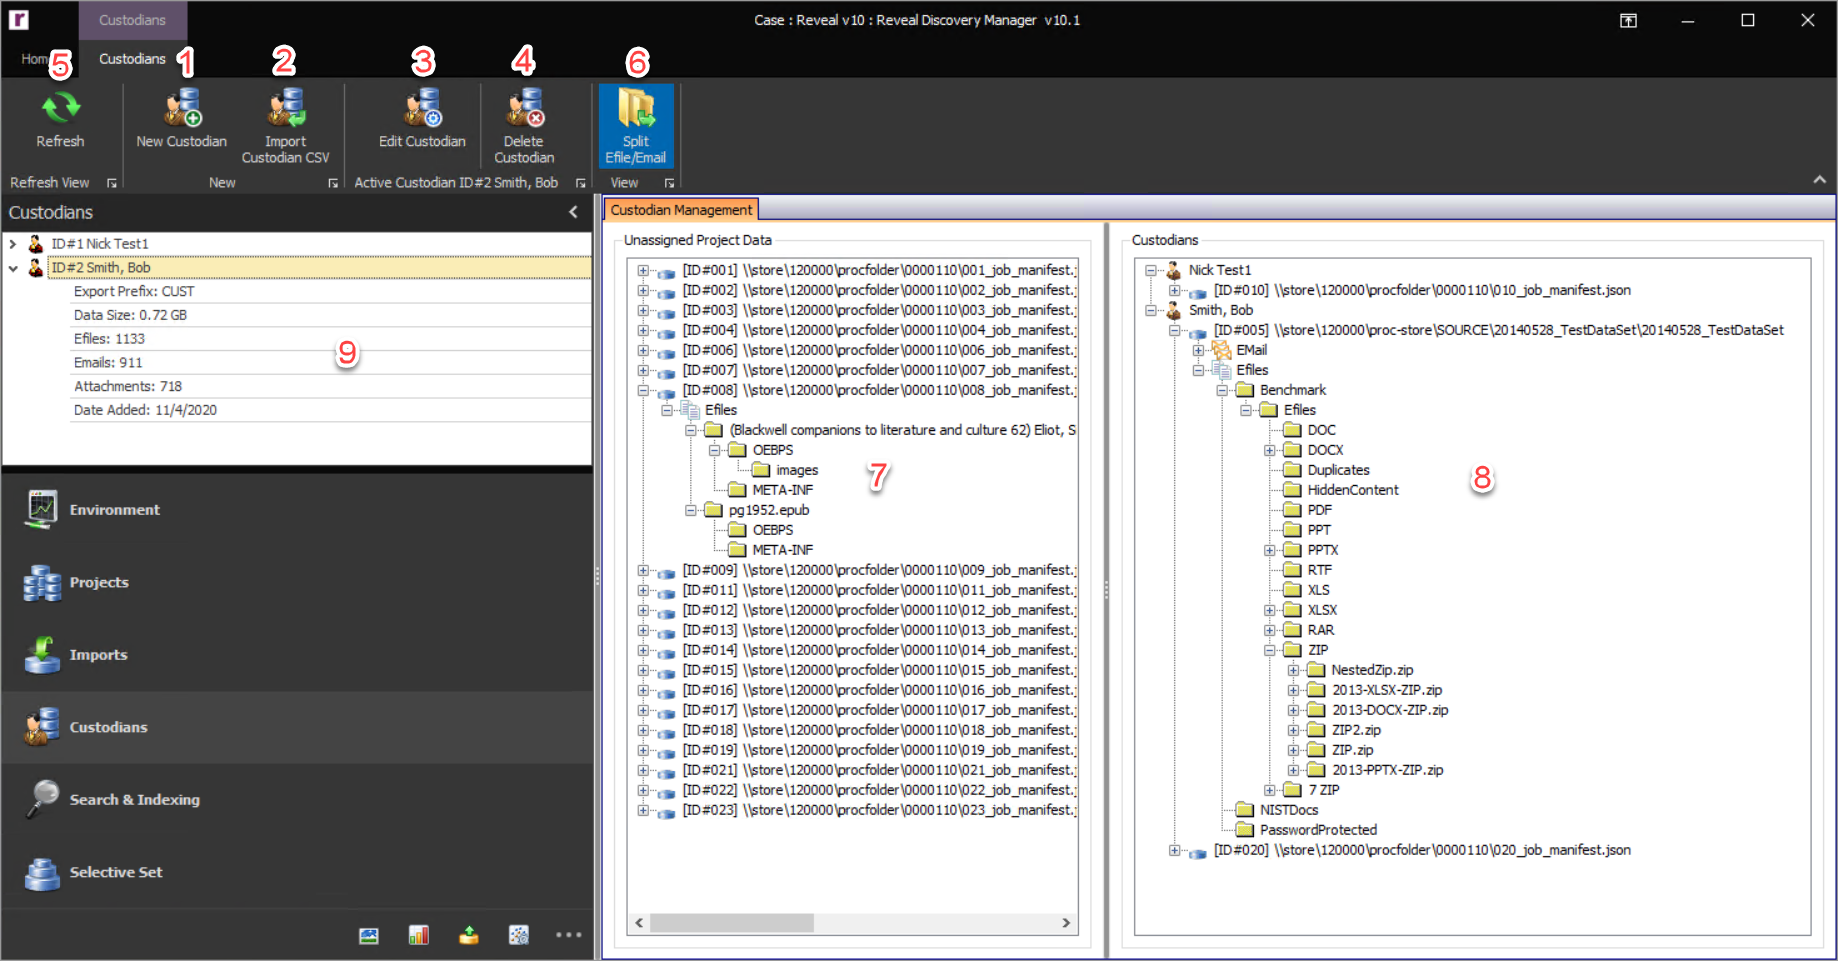
After the data are imported into the project, the import shows up as a tree view within the Unassigned Project Data section. By default, the tree view will recreate the folder structure of the source data down to the folder level. A different view can be applied to the data by clicking the Split Efile/Email button in the Custodians Ribbon. If this setting is chosen, the top level item in the tree view is the import path followed by the data classification where Efiles are separated from Email. Underneath the Efiles and Email the tree view recreates the folder structure for the source data down to the folder level.
Creating/Editing/Deleting Custodians
New Custodian – Click the New Custodian button in the Custodians Ribbon and the form below will appear for adding a custodian. There are two Custodian Types that can be created. The input of a Custodian Prefix for labeling that custodian's content is optional as of Release 10.3: one of the settings in Export is Custodian Prefix Incremental when it comes to numbering the files. This will add the Export Prefix onto the number for files pertaining to the custodian within any scope.
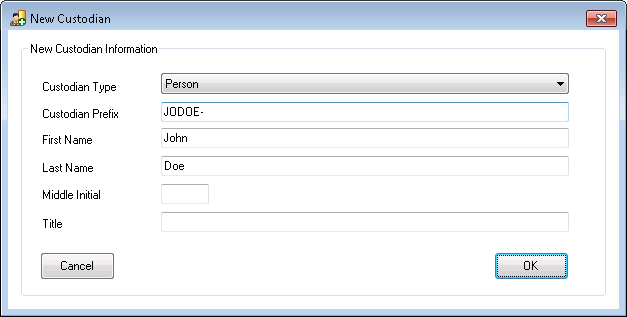
Person – This is the default Custodian Type. The minimum information for a Person Custodian is the First Name and Last Name. After filling out the New Custodian form, click OK, and the
 icon will appear in the Module Navigation and the Custodian Management section within the module form.
Entity – The other Custodian Type is Entity. This Custodian Type allows for only one name if necessary. To create an Entity Custodian, click the Custodian Type drop-down, change it to Entity, and enter the Entity Name. After filling out the New Custodian form, click OK, and the
 icon will appear in the Module Navigation and the Custodian Management section within the module form.
Import Custodian CSV – To import multiple custodian names via a CSV file, click the Import Custodian CSV button in the Custodians Ribbon and the form below will appear. The minimum information for the CSV file is the Export Prefix (Column A of CSV), the First Name (Column B of CSV) and Last Name (Column D of CSV) of the custodian. One of the settings in Export is Custodian Prefix Incremental when it comes to numbering the files, which will add the Export Prefix onto the number for files pertaining to the custodian. After browsing to the CSV file, click the Import Load File button, review the results displayed in the table, and if correct click the Add Custodians button. The
 icon will appear in the Module Navigation and the Custodian Management section within the module form for each custodian.
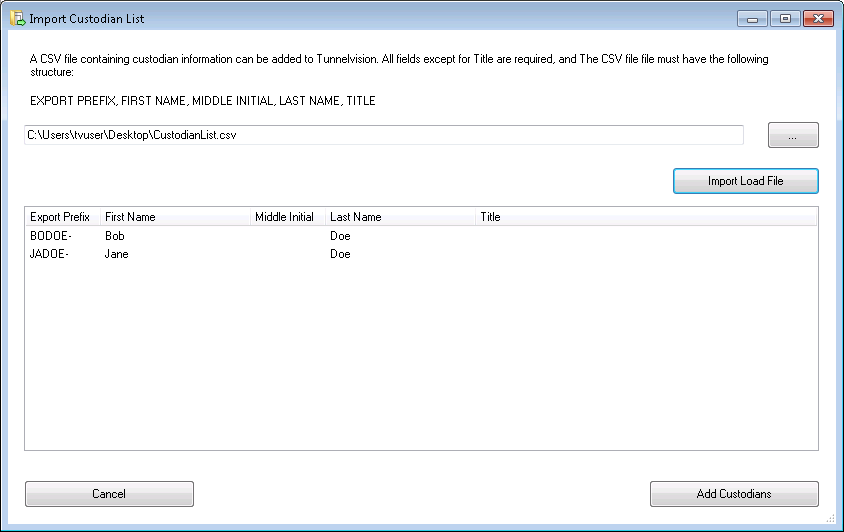
Edit Custodian – To edit a custodian after creation click the Edit Custodian button in the Custodians Ribbon.
Note
This setting can be used to reset the Export Prefix for the Custodian Prefix Incremental numbering. Since the Custodian Prefix Incremental numbering always picks up from the last number used during export, the recommended way to reset this number back to 1 is to change the Export Prefix to a new prefix. Otherwise, you would need to delete all previous exports for this custodian from Discovery Manager.
Delete Custodian – To delete a Custodian first select the Custodian in the Custodians Module Navigation and then click the Delete Custodian button in the Custodians Ribbon.
Refresh – Click the Refresh button to refresh the Custodians Module to show new Custodians created as well as previously unassigned data that has been assigned to a Custodian and to update the Custodian group’s statistics.
Assigning Data
Split Efile/Email – By default, the tree view will recreate the folder structure of the source data down to the folder level. A different view can be applied to the data by clicking the Split Efile/Email button in the Custodians Ribbon. If this setting is chosen, the top level item in the tree view is the import path followed by the data classification where Efiles are separated from Email. Underneath the Efiles and Email the tree view recreates the folder structure for the source data down to the folder level.
Unassigned Project Data – This section shows the data that has not been assigned to a custodian within the project.
Data Assignment – To assign data to a custodian, drag and drop the entire import, data classification, or folder from the Unassigned Project Data section to the correct custodian in the Custodian Management section. After all data from an import is assigned, the import will be removed from the Unassigned Project Data section. Any part of the import not assigned to a custodian will remain in the Unassigned Project Data section and will appear in exports under a custodian named “UNASSIGNED” if responsive to the data set being exported.
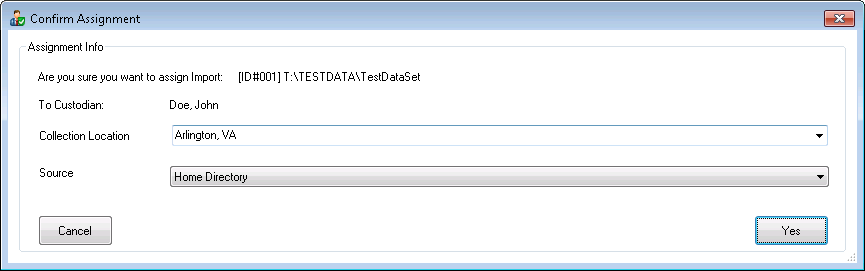
Confirm Assignment – During the data assignment, the Confirm Assignment message box will pop up asking to confirm the assignment and to supply the Collection Location and Source of the data that is being assigned. This information is useful for reporting purposes, but it is not required to assign data to a custodian.
Custodian Management – This section displays the data assigned to a custodian within the project.
Data Unassignment – To unassign data from a custodian, right click on the custodian, import, data classification, folder or file and click unassign. If data is unassigned from a custodian it will appear in the Unassigned Project Data section.
Module Navigation – The Custodian Module Navigation displays the various custodians in the project. Each custodian has an icon and has a tree view which displays the following values:
Export Prefix -- The export prefix defined for the custodian.
Data Size – This is the total size of the imported data that is assigned to the Custodian in gigabytes.
Efiles – This is the total number of efiles assigned to the Custodian.
Email – This is the total number of parent emails assigned to the Custodian.
Attachments – This is the total number of attachments assigned to the Custodian.
Date Added – This is the date the Custodian was created.