Reports Module
The reports module is a powerful feature used to document results around work done within the system as well as providing data analysis capabilities for evaluating results.
The Reports module allows users to create, view, save and print reports generated within the system. There are 30+ report formats to choose from (see [1] in illustration below), results can be viewed based on any level of deduplication [2], and the scope of the report to be generated can be defined by any of the available work product created within Discovery Manager [3].
Report settings are driven by the type and scope of a report. For example, selecting any report with a scope setting of search terms will enable a checkbox setting for Document Level which allows a user to define the report scope to just the files that hit on the defined search. Another example would be the display settings when running a Document Timeline report where the user has the ability to define the frequency, time period, and the file types they would like to report back on.
Creating a Report
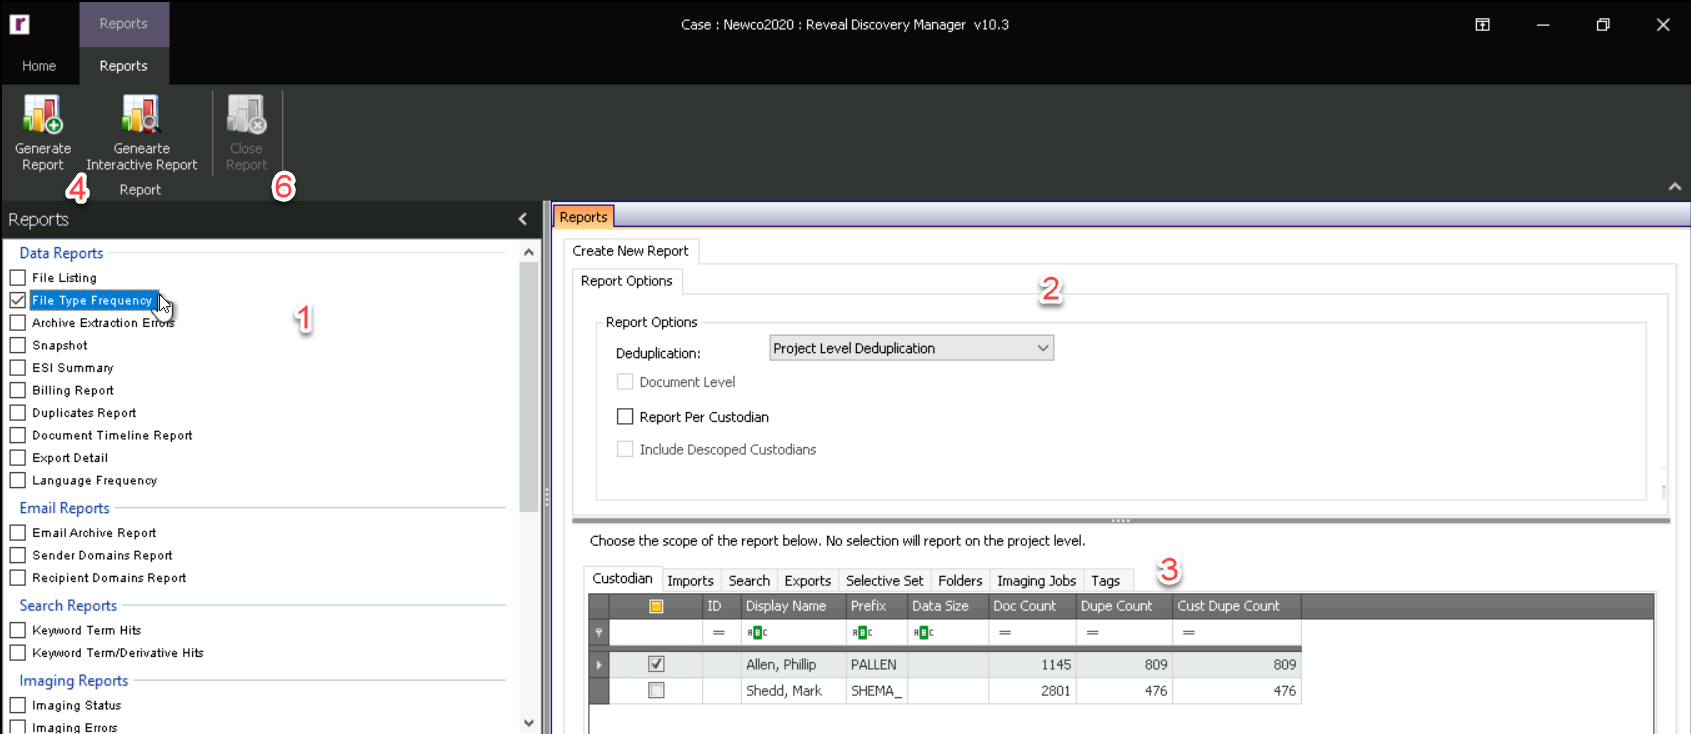
Choosing a Report – Select
 a report in the Reports Module Navigation. A description of all reports can be found in Appendix A.
Report Options – The Reports Options are driven per report and per tab. Options available will vary according to Report Type selected. The more common Report Options are Deduplication and Document Level:
Deduplication – Deduplication dictates the duplicate handling within the report. By default, deduplication is set to No Deduplication. To change deduplication, choose one of the following settings:
No Deduplication – The report generated will include original and duplicate files with the file count.
Custodian Level Deduplication – The report generated will only include the original files within the applicable Custodians.
Project Level Deduplication – The report generated will only include the original files within the entire project.
[Custom Flexible Dedupe Scope] -- New to Version 10.1 is a Flexible Dedupe Scope tool that allows a user to define a custom level of deduplication not entirely dependent upon order of load within a project or custodian. The new Flexible Deduplication Scope allows a user to define additional criteria for deduplication and precedence of master documents by specifying prior export scopes to be incorporated into deduplication. This scope is defined in the Export Module, and uses prior exports as source for the custom scope. Since reports are often run before exports to preview output, a defined Dedupe Scope is soft-added to the report criteria. For more information on this tool see Export Module - Custom Flexible Dedupe Scope for more information.
Document Level – This setting dictates if the report will be generated on the Document or Family Level.
Report Per Custodian – This setting will break a reporting scope per custodian. This setting would be used within a scope where several Custodians exist, and a report per Custodian is needed within the scope.
Include Descoped Custodians – This setting when coupled with the Report Per Custodian setting will include all Custodians within the report even if they are not responsive or within the population. For example, it may be desired to return a Custodian within the Keyword Term Hits report when the Report Per Custodian setting is selected so that the Custodian will be represented within the report as having 0 hits.
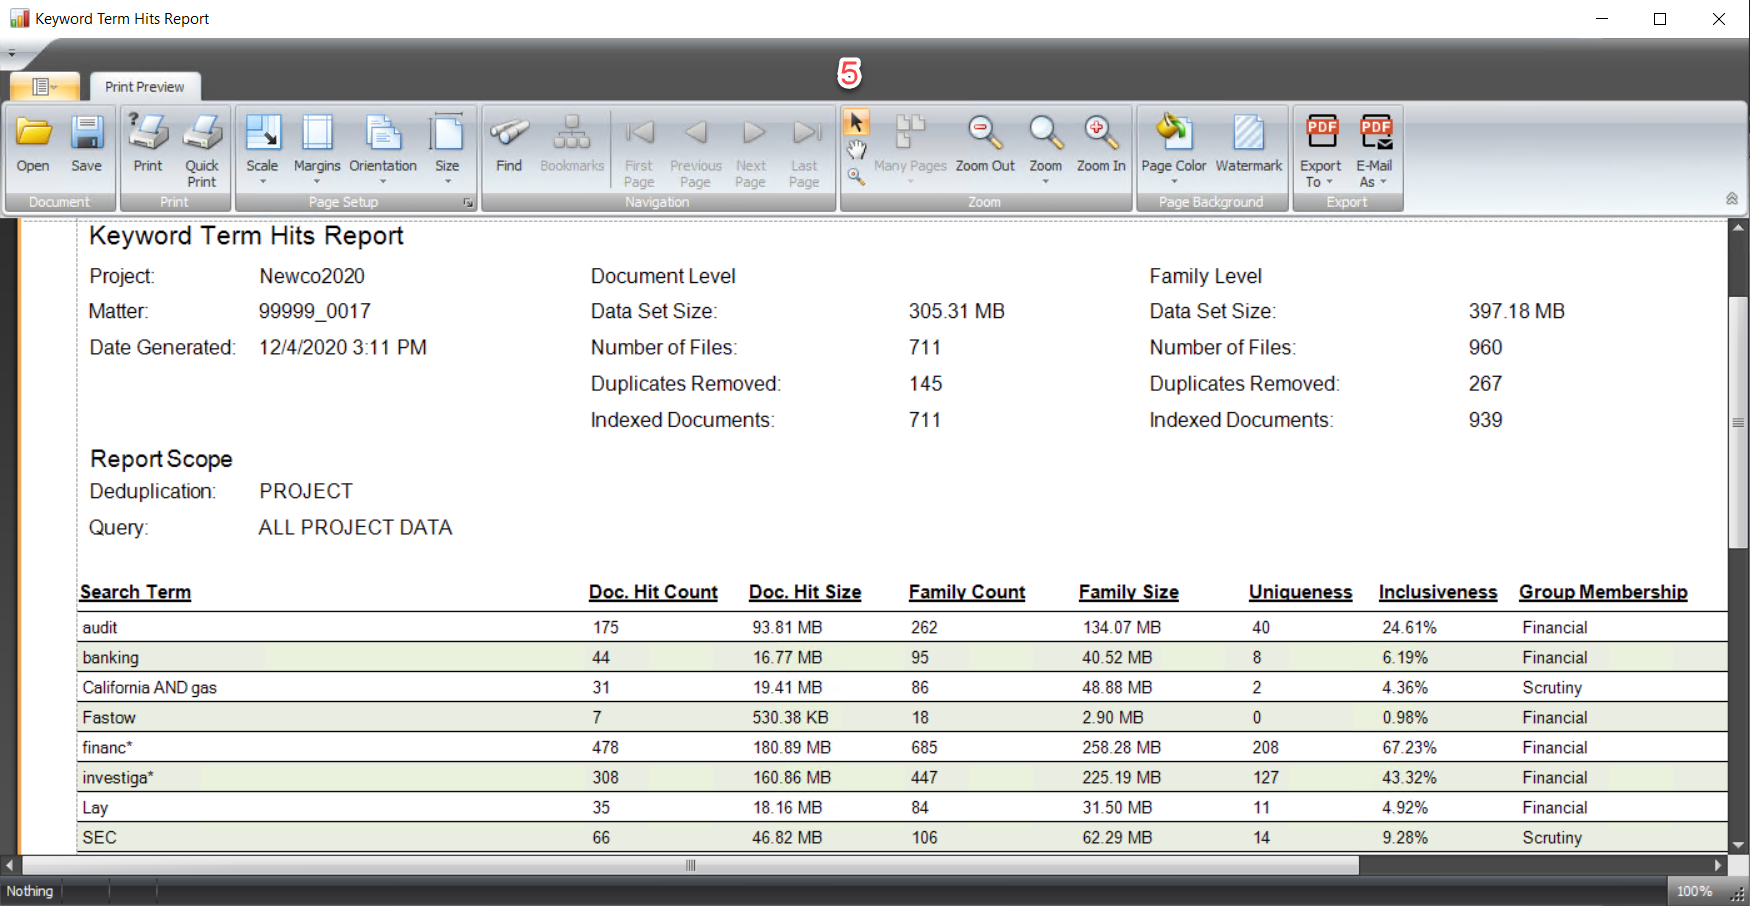
Include Uniqueness/Inclusiveness in Report -- This setting, which appears in Search Reports only, adds the uniqueness of the Keyword to the document set and the inclusiveness of the term across the scope. Uniqueness is the number of files that uniquely and only hit on the particular Keyword Term; this means that if this Keyword Term were deleted from the case, these unique files would be removed from the responsive set. Inclusiveness is the percentage of Doc Hits/Indexed Files; if the percentage is high for a particular Keyword Term, that term may be over inclusive and may need to be revised. Here is an example of a Keyword Terms Hit Report including figures for Uniqueness and Inclusiveness of each term.
Isolate Terms – This setting, which appears in Search Reports only, will only return the Keyword Terms chosen within the scope of the report. This is only available for the Keyword Terms and Groups tabs. Selecting Isolate Terms opens a tab in Report Options to Isolate to Search Group or Isolate to Search Terms, each as selected from the list for each scope.
Create Report Tabs – Each tab contains data subsets created within the different modules. Select one or more items within one tab only by clicking the item’s checkbox
 . If multiple items are checked within one tab they will be combined with the OR operator. Certain reports will disable tabs as the reports can only be executed within certain module content. To select multiple items across multiple tabs, a Selective Set will have to be created and selected to generate the report.
Note
If there are no items selected within the tabs, the report will be generated on the Project level.
Generate Report – After selecting the report, the report settings and the item(s) from the tabs, click the Generate Report button in the Reports Module ribbon and the report will be created in the Report tab. You also have the option to Generate Interactive Report to enable further inquiry from the report itself.
After Creating a Report
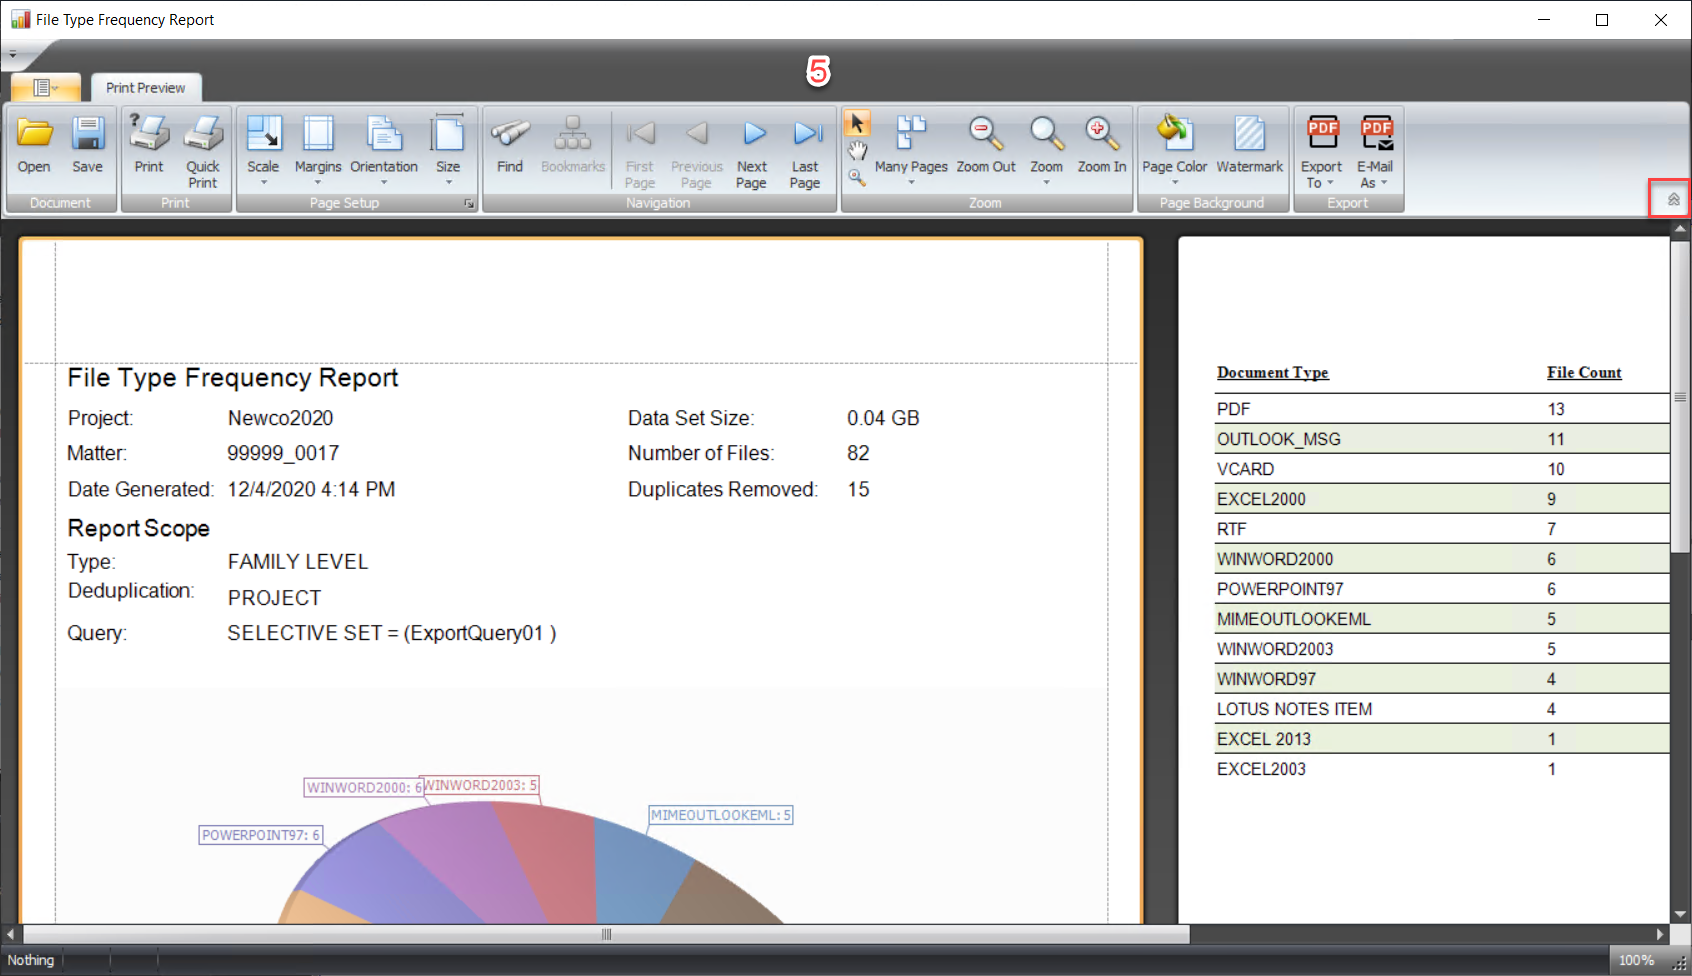
Report Window – A new Report window will open to show the latest generated report.
Report Tool Bar – To figure out what each button does in the tool bar, place the mouse pointer over the button and a description of the button will appear. The following highlights a couple of the tool bar’s settings:
Document -- Reports may be saved and then opened here in .prnx Native Format.
Print -- Configure or Quick Print - these options are rarely used, as the report may be exported in a number of formats as shown below.
Page Setup -- Controls tuning scale, margins, orientation and size for report output formatting.
Find – Search the report by clicking the Find
 button. The search bar has Previous and Next hit navigation and option settings for Case sensitive and Whole words only.
Page Navigation – If the report has multiple pages, go to the next page by clicking the
 button, the previous page by clicking the
  button, the last page of the report by clicking the
  button, or the first page of the report by clicking the
  button.
Zoom – Magnification controls: Zoom out by clicking the
 button, zoom in by clicking the
  button, or zoom to a specific percent size by clicking the
  button.
Page Background -- Options for output color or watermarking. To add a logo to the report:
click the Watermark button (
 ),
),click the Picture Watermark tab,
click Load Image and browse to the logo.
If having the logo at the top of the report is desired, change the Vertical alignment setting to Top,
click the OK button.
Export – Export a report by clicking the Export To (
 ) button. By default, the report will be exported to PDF format; the current selection will appear in the Export button icon. To choose another format click the down arrow
  next to the button and choose from the following:
HTML
MHT
RTF
DOCX
XLS
XLSX
CSV
TEXT
Image file (Select type and configure in Image Export Options pop-up box).
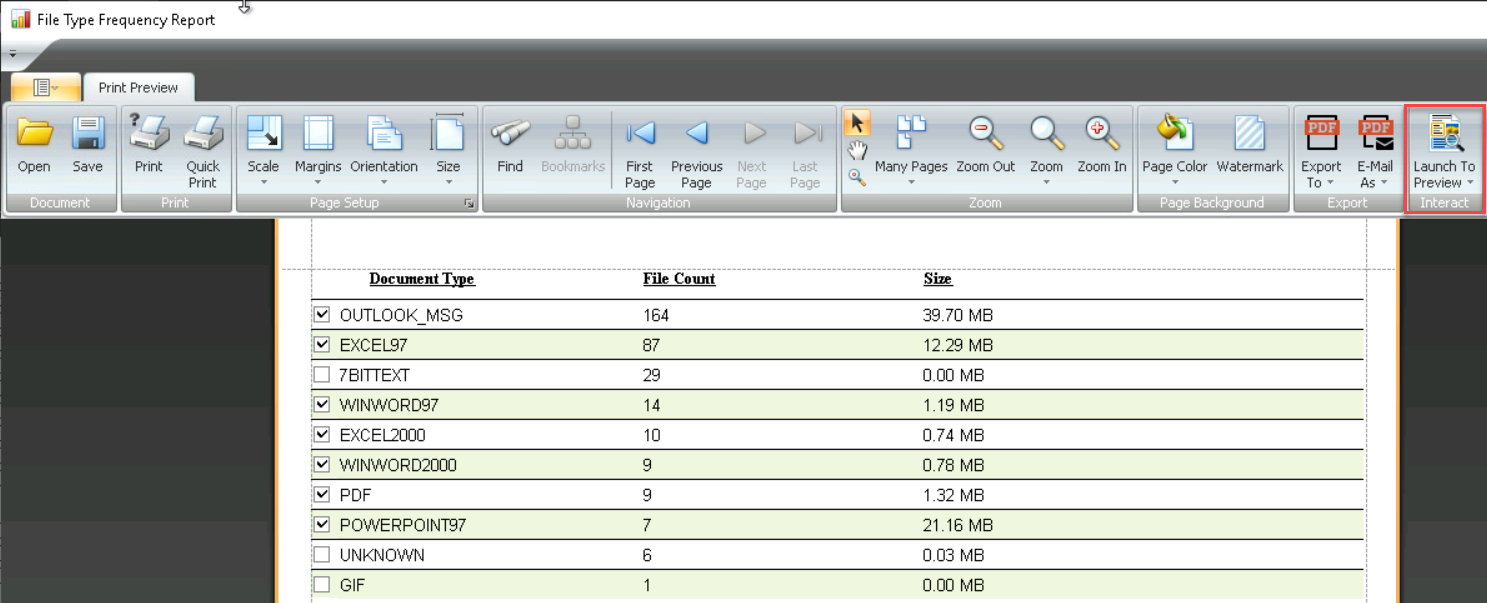
Launch to Preview - This is the Interactive Report control that allows you to select and pull up items from within the report.
Close Report – To close the Report Tab, exit out of the window or click the Close Report (
 ) button.