NIST Database Installation (Optional)
The National Institute of Standards and Technology (NIST) created an evolving list of hash values that identify system files. Discovery Manager allows for the removal of these files to reduce the overall data size.
The NIST Hash Library must be installed to enable users the ability to DeNIST. If a Local SQL Environment is being used, the NIST database needs to be imported on each local machine in order for DeNISTing to work. If a Full SQL Server Environment is being used, the NIST database needs to be imported only once. The following explains two different ways to import the NIST Hash Library into Discovery Manager.
Attaching Precompiled NIST Database in SQL
The most efficient way to handle this is to attach a precompiled NIST database. The latest precompiled NIST database can be obtained by contacting Reveal Support:
This precompiled database will be updated quarterly and uploaded to the Support Customer Portal at which point all clients will be notified.
After downloading the precompiled database connect to the SQL Server via the SQL Server Management Studio Express and perform the following steps.
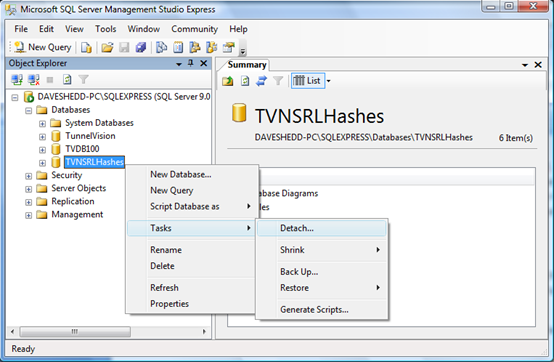
Right click on the InstanceName_NIST (here seen as TVNSRLHashes) database and click Tasks -> Detach and Detach Database.
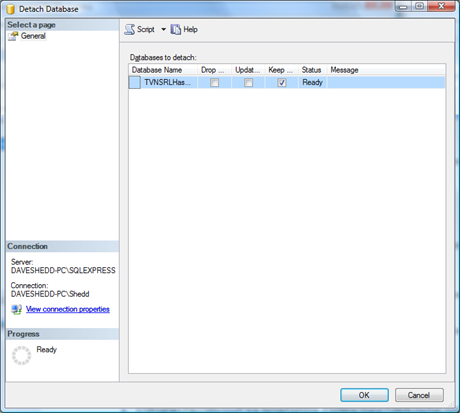
Click OK.
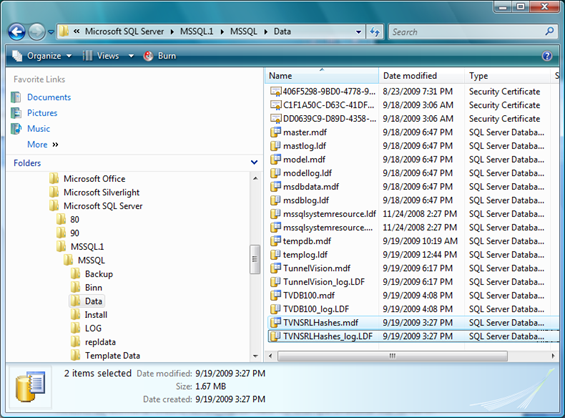
Go to the default data path of where the SQL databases are stored and delete the InstanceName_NIST.mdf and InstanceName_NIST_log.ldf files (in this example shown as TVNSRLHashes.mdf and TVNSRLHashes_log.LDF). For example, on a Local SQL Server Express in Windows Vista, the following two files would be deleted from the following directories:
C:\Program Files\Microsoft SQL Server\MSSQL.1\MSSQL\Data\InstanceName_NIST.mdf
C:\Program Files\Microsoft SQL Server\MSSQL.1\MSSQL\Data\InstanceName_NIST_log.ldf
Unzip NIST_Precompiled_DB.zip and copy theInstanceName_NIST.mdfand InstanceName_NIST_log.ldffiles to the default data path.
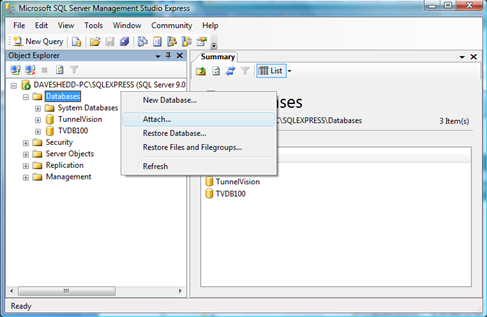
Back in SQL Server Management Studio, right Click on Databases and choose Attach.
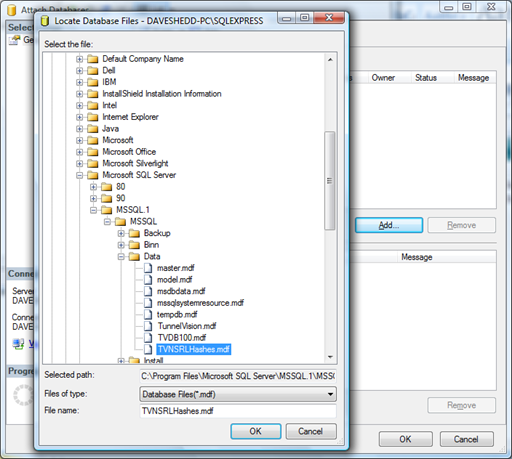
Click Add and browse to the InstanceName_NIST.mdf file.
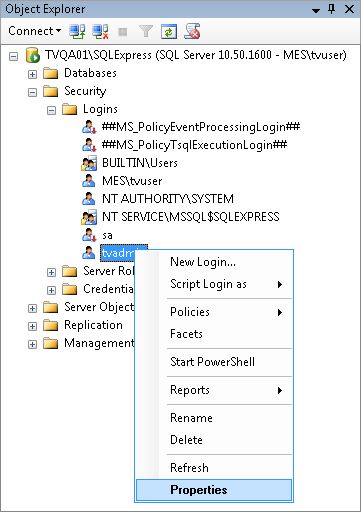
The next step is to make sure that the SQL Login created under SQL Server Setup (or Windows account added to SQL Server) is an owner of this database. Failure to complete this step will cause several issues when choosing to DeNIST a project. To do this properly in SQL Server Management Studio expand Security -> Logins, right click on the SQL Login, and choose Properties.
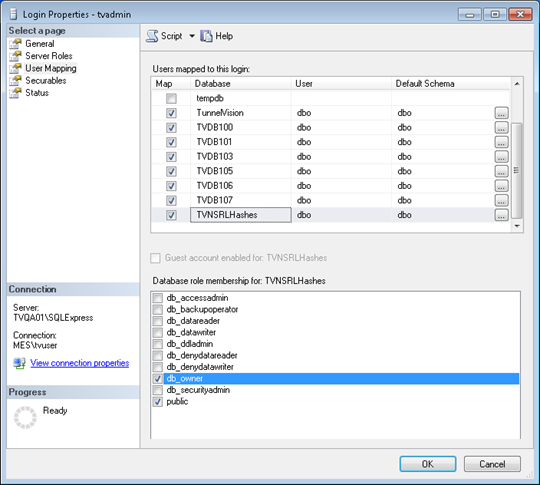
Choose User Mapping, choose InstanceName_NIST from the Database list, choose the checkbox next to dbowner, and click OK.
Importing the NIST Hash Library Directly from the NIST Website
Another way to accomplish this is to import the NIST Hash Library by downloading the NIST files directly from the NIST website and importing them through the application itself by clicking Admin -> Import NIST Library from the application’s toolbar. Once opened, import the NIST Hash Library by following the instructions.
If your organization uses a custom hash library, that library can be imported using this methodology on top of the precompiled NIST database. There is a chance that the NIST library will be updated before the precompiled database is released quarterly by Reveal. In this scenario the NIST database can be updated manually before the precompiled database is released.
The drawback to this method is if the entire NSRL NIST hash library is imported it will take greater than 24 hours to import the list, so if efficiency is the goal please defer to the precompiled database.